Trusted by 150+ Homeowners
Crawl Space Encapsulation in The Crossings, FL
- Over 154 5-Star Reviews
- Free Estimates and Quotes
- 100% Satisfaction Guaranteed
- Child, Family & Pet Safe Steps
- 24-Hour Emergency Service
- Fully Licensed & Insured

Don’t Let The Crossings, FL Humidity Ruin Your Home’s Foundation
Here in The Crossings, FL, we know a thing or two about humidity. That sticky, heavy air isn’t just uncomfortable; it can wreak havoc on the hidden spaces of your home, especially your crawl space. When that dampness lingers, it creates the perfect breeding ground for mold, mildew, and even structural damage. Protecting your foundation from these persistent moisture issues is absolutely critical for your home’s long-term health and value. We’ve seen firsthand how neglecting this area can lead to costly repairs down the line, so we’re here to help you get ahead of it.
Our neighbors trust us with their crawl space needs because we focus on what truly matters: effective, lasting solutions. With over 165 five-star reviews from homeowners in the area, you can be confident that our team understands the unique challenges our local climate presents. We don’t just patch problems; we aim to prevent future issues by tackling the root cause of moisture intrusion. Your satisfaction is our top priority, and we work hard to earn that trust with every job we do.
- Improved Indoor Air Quality: By sealing off your crawl space, we prevent mold spores and musty odors from entering your living areas, making your home healthier for everyone.
- Foundation Protection: Encapsulation creates a barrier against ground moisture, which can otherwise weaken your foundation over time and lead to costly structural repairs.
- Increased Energy Efficiency: A properly sealed crawl space helps regulate your home’s temperature, reducing energy loss and potentially lowering your utility bills.
How Crawl Space Encapsulation Actually Works
Tackling crawl space moisture requires a methodical approach. It’s more than just throwing down a plastic sheet; it’s about creating a sealed environment that actively manages humidity. When corners are cut during encapsulation, you’re often left with the same dampness and its associated problems, just hidden under a new layer. Our crews follow a detailed, proven process to ensure your crawl space is properly protected, leaving you with a dry, healthy space beneath your home. We’re committed to doing it right, the first time.
Step 1: Assessment and Preparation
Before we do anything, our technicians thoroughly inspect your crawl space. We’re looking for the sources of moisture, checking for existing damage, and identifying any potential entry points. This initial assessment helps us tailor the encapsulation plan specifically for your property. Careful planning prevents problems and ensures we’re addressing all contributing factors. This usually takes a couple of hours.
Step 2: Moisture Removal and Drying
If there’s standing water or excessive dampness, we’ll use specialized equipment like industrial dehumidifiers and air movers to dry out the space. It’s important to remove as much existing moisture as possible before sealing to prevent mold growth underneath the barrier. This drying phase can take anywhere from a few hours to a couple of days, depending on the severity.
Step 3: Sealing Vents and Penetrations
Next, we meticulously seal off all exterior vents, utility penetrations, and any other openings that allow outside air and moisture to enter. We use durable, high-quality sealants and materials to ensure these points are completely airtight. This step is crucial for creating a truly isolated environment within your crawl space. This part typically takes half a day.
Step 4: Installing the Vapor Barrier
This is the core of the encapsulation process. We install a heavy-duty, multi-layer vapor barrier that covers the entire floor and often extends up the foundation walls. This barrier acts as a robust shield, preventing moisture from migrating up from the soil. We ensure there are no gaps or tears, creating a continuous, impermeable layer. This is a significant part of the work, often taking a full day or more.
Step 5: Installing a Dehumidifier (Optional but Recommended)
For maximum protection, especially in our humid climate, we can install a dedicated crawl space dehumidifier. This unit actively monitors and controls the humidity levels within the encapsulated space, ensuring it stays at a safe, dry level year-round. It’s a smart investment for long-term moisture management. This final step usually takes a few hours.
Don’t wait for the dampness to cause bigger headaches. Schedule your crawl space inspection today and take the first step towards a healthier home. We’re ready to provide a clear plan for your property.

Warning Signs You Need Crawl Space Encapsulation
Catching these issues early can save you a lot of trouble and money. Your crawl space might be out of sight, but it’s not out of mind when it starts showing these warning signs. Recognizing them means you can address the problem before it escalates into something much more serious and expensive to fix. Let’s look at what to watch for around your property.
Musty Odors That Won’t Go Away
That persistent, unpleasant smell isn’t just annoying; it’s a clear indicator of mold or mildew growth, often fueled by excess moisture. If you notice these odors getting stronger indoors, it’s time to investigate your crawl space. Investigate the source of smells before they impact your air quality.
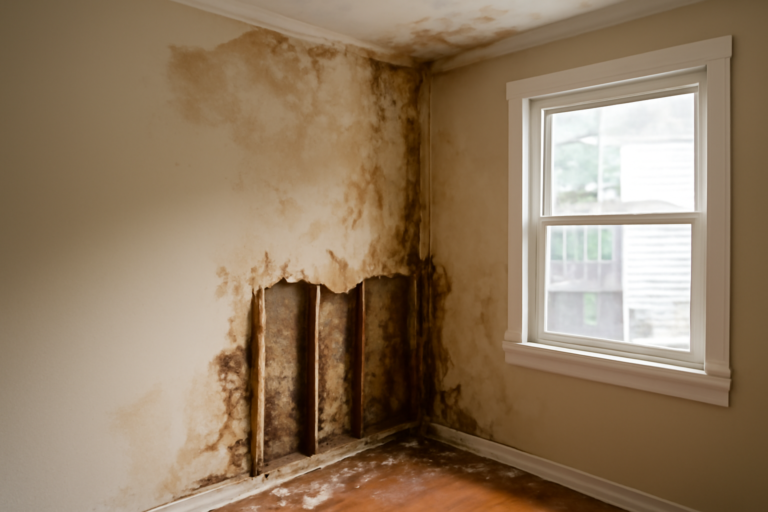
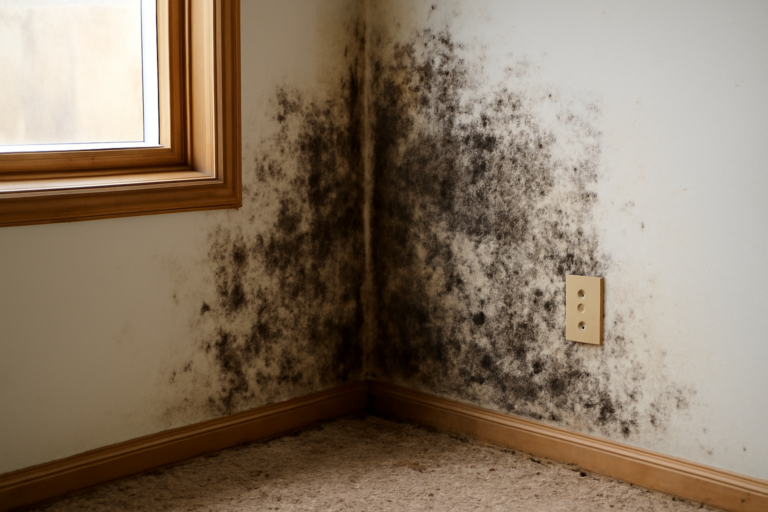
Visible Mold or Mildew
If you see fuzzy patches of black, green, or white growth on your floor joists, insulation, or foundation walls, that’s mold. Mold thrives in damp, dark environments like an unsealed crawl space. Addressing mold growth is essential for your home’s health.
High Humidity Levels Inside Your Home
Does your home feel unusually damp, even when your air conditioning is running? High humidity in your living space can often be traced back to moisture issues in your crawl space. Monitor your home’s humidity to catch problems early.
Deteriorating Insulation
When insulation in your crawl space becomes damp, it loses its effectiveness and can begin to break down. You might notice it sagging, crumbling, or smelling musty. Replacing damaged insulation is often a sign of a deeper moisture problem.
Increased Pest Activity
Insects like termites, ants, and roaches, as well as rodents, are attracted to damp, dark environments. An increase in pests around your home could be a sign that your crawl space is providing them with a welcoming, moist habitat. Control pest infestations by fixing the underlying moisture issue.
Wood Rot or Structural Damage
Constant moisture can lead to wood rot in your floor joists and support beams. You might notice soft spots in the wood, or even visible damage. This is a serious structural concern that requires immediate attention. Preventing wood rot is key to your home’s stability.
Crawl Space Encapsulation vs. DIY: When To Call a Professional
| Situation | DIY? | Call a Pro? | Why |
|---|---|---|---|
| Minor dampness on soil | Yes, with caution | Yes | A pro ensures proper material and sealing techniques. |
| Standing water present | Absolutely Not | Yes | Requires specialized equipment and knowledge to remove safely. |
| Visible mold growth | Absolutely Not | Yes | Requires containment and proper remediation protocols to avoid spreading spores. |
| Installing a heavy-duty vapor barrier | Maybe, if experienced | Yes | Achieving a perfect seal is critical and difficult for amateurs. |
| Sealing vents and penetrations | Maybe, for simple ones | Yes | Ensuring airtight seals requires skill and the right materials. |
| Installing a dedicated dehumidifier | Maybe, if comfortable with wiring | Yes | Pros ensure correct placement and integration for optimal performance. |
While some minor dampness might seem manageable with a DIY approach, the complexities of creating a truly sealed and healthy crawl space often outweigh the perceived savings. Professional encapsulation provides lasting results because our team has the tools, experience, and materials to do it correctly. It’s an investment in your home’s long-term well-being.
Crawl Space Encapsulation Cost In The Crossings, FL
The cost of crawl space encapsulation in The Crossings, FL, can vary widely. Factors like the size of your crawl space, the extent of existing moisture damage, and the specific materials needed all play a role. These price ranges are estimates to give you a general idea. Understanding the factors influencing cost helps you budget effectively.
| Service | Typical Price Range | What Affects Cost |
|---|---|---|
| Crawl Space Inspection & Assessment | $150 – $400 | Size of crawl space and complexity of issues found. |
| Moisture Removal & Drying | $300 – $1,500 | Amount of water present and drying time required. |
| Vapor Barrier Installation (Standard) | $1,000 – $3,000 | Square footage of the crawl space and thickness of the barrier material. |
| Vapor Barrier Installation (Heavy-Duty/Multi-Layer) | $2,000 – $5,000 | Higher quality materials and more extensive wall coverage. |
| Sealing Vents & Penetrations | $200 – $800 | Number of openings and complexity of access. |
| Crawl Space Dehumidifier Installation | $500 – $1,500 | Type and brand of dehumidifier, plus installation complexity. |
Getting an exact quote requires a thorough on-site inspection. We offer free estimates so you know exactly what to expect before any work begins. Our team is happy to walk you through the process and answer all your questions.
Service Areas Near The Crossings, FL
Miami, Kendall, Pinecrest, Palmetto Bay, Cutler Bay, Homestead, Florida City, Doral, Hialeah, Coral Gables, South Miami, Sunny Isles Beach, Aventura, Bal Harbour, Surfside, North Miami Beach, North Miami, Miami Springs, Medley, Opa-locka.
Common Questions About Crawl Space Encapsulation
How long does crawl space encapsulation take?
The timeline for crawl space encapsulation typically ranges from one to three days, depending on the size of your crawl space and the extent of existing moisture issues. Our team works efficiently to complete the job thoroughly. We start with a detailed assessment and then proceed with drying, sealing, and barrier installation. Proper preparation ensures a faster completion.
Will my homeowner’s insurance cover crawl space encapsulation?
Generally, homeowner’s insurance policies do not cover crawl space encapsulation as it’s considered a preventative maintenance measure. However, if damage has already occurred due to a specific event like a burst pipe, some related repair costs might be covered. It’s always best to check your specific policy. We can provide documentation for your records.
What are the health risks associated with an unsealed crawl space?
Unsealed crawl spaces can harbor mold, mildew, dust mites, and other allergens. These contaminants can easily travel into your living space, leading to respiratory problems, allergies, and other health issues. Improving air quality starts below. Encapsulation creates a barrier against these harmful elements.
What kind of materials are used for crawl space encapsulation?
We use heavy-duty, multi-layer vapor barrier materials, typically made of reinforced polyethylene. These are designed to be durable and impermeable, effectively blocking moisture from the soil. We also use specialized sealants and tapes to ensure all seams and edges are completely airtight. High-quality materials ensure long-term protection and prevent future issues.
Can I just seal my crawl space vents instead of encapsulating?
While sealing vents is part of the encapsulation process, it’s not a complete solution on its own. Simply sealing vents without installing a robust vapor barrier can lead to a build-up of humidity within the crawl space, potentially worsening mold and rot issues. True encapsulation involves a full system. We recommend a complete encapsulation for the best results in our climate.
Check Our Other Relevant Services

Christopher Cannon: Damage Restoration Expert
Christopher Cannon is a licensed restoration specialist with more than 20 years of dedicated experience in property mitigation and disaster recovery. Known for his technical precision and authoritative industry knowledge, Christopher has spent two decades helping property owners navigate the aftermath of unforeseen damage.
𝗖𝗲𝗿𝘁𝗶𝗳𝗶𝗰𝗮𝘁𝗶𝗼𝗻𝘀: Christopher maintains a robust portfolio of IICRC certifications, including Water Damage Restoration (WRT), Mold Remediation, Applied Structural Drying (ASD), Odor Control, and Fire and Smoke Restoration. These credentials reflect his commitment to the highest safety and restoration standards.
𝗕𝗲𝘀𝘁 𝗣𝗮𝗿𝘁 𝗼𝗳 𝘁𝗵𝗲 𝗝𝗼𝗯: He finds the greatest satisfaction in being the “calm during the storm,” helping families feel secure as they watch their property return to a safe, healthy state.
𝗙𝗮𝘃𝗼𝗿𝗶𝘁𝗲 𝗣𝗮𝘀𝘁𝗶𝗺𝗲: An avid outdoorsman, Christopher enjoys mountain biking and spending quality time with his family.