Trusted by 150+ Homeowners
Ceiling Drywall Water Damage Restoration in Country Club, FL
- Over 154 5-Star Reviews
- Free Estimates and Quotes
- 100% Satisfaction Guaranteed
- Child, Family & Pet Safe Steps
- 24-Hour Emergency Service
- Fully Licensed & Insured
When Rainwater Meets Your Ceiling: Country Club, FL’s Ceiling Drywall Water Damage Restoration Experts
Here in Country Club, FL, we know all about those sudden, intense thunderstorms that can roll in. Sometimes, the sheer volume of rain can overwhelm roof flashing or gutters, leading to water finding its way into your attic and, eventually, your ceiling. It’s a common problem around here, especially after heavy downpours, and it’s important to address it quickly. Ignoring that damp spot can lead to much bigger headaches than you might expect, so knowing who to call for prompt ceiling repair is key to protecting your home. We’re here to help you navigate these unexpected water issues with clear, honest advice.
Homeowners around the area trust us because we understand the urgency of water damage, especially to your ceilings. We’ve helped more than 165 clients in your neighborhood achieve fantastic results, and they’ve shared their positive experiences. When you see that first sign of trouble on your ceiling, you want a team that knows exactly what to do, from identifying the source to making sure your ceiling is restored perfectly. We’re dedicated to providing that kind of reliable service, ensuring your home is safe and looks its best again.
- We specialize in quickly drying out affected drywall, preventing further structural damage and mold growth before it even starts.
- Our team uses advanced techniques to accurately pinpoint the water source, ensuring the problem is fixed at its root, not just the symptom.
- We handle everything from water extraction and drying to seamless drywall repair and painting, leaving your ceiling looking like new.
How We Tackle Ceiling Drywall Water Damage Head-On
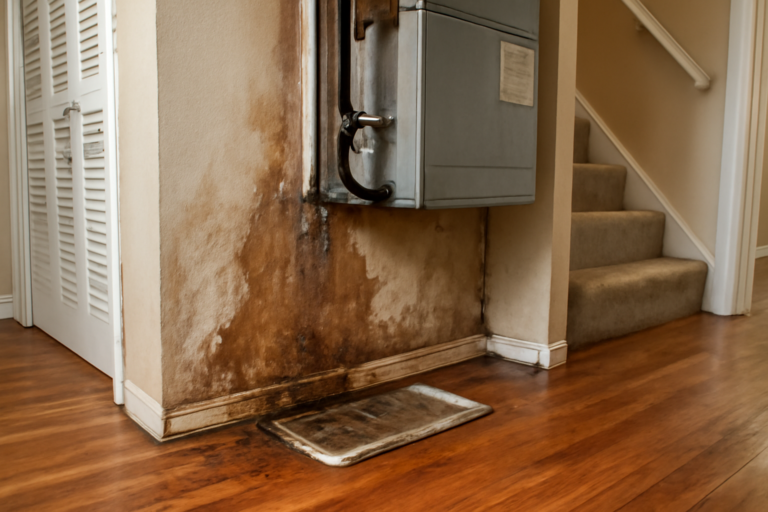
Dealing with water damage to your ceiling isn’t something you want to put off. When water soaks into drywall, it can weaken the material, leading to sagging, staining, and even collapse if left untreated. Our approach is all about being thorough and efficient. We don’t just slap a coat of paint over the problem; we make sure the area is completely dried, any damaged materials are replaced, and the integrity of your ceiling is restored. This detailed process is what makes all the difference in preventing future issues and ensuring a lasting repair.
Step 1: Initial Assessment and Water Source Identification
The first thing we do is thoroughly inspect the affected ceiling area and the space above it, usually your attic. We use specialized tools to locate the exact source of the water intrusion, whether it’s a roof leak, a plumbing issue from upstairs, or condensation. This step is crucial for preventing repeat damage and typically takes about 1-2 hours, depending on accessibility. Identifying the root cause of the leak is our top priority.
Step 2: Water Extraction and Drying
Once we know where the water is coming from, we’ll extract any standing water and begin the drying process. We use industrial-grade air movers and dehumidifiers to pull moisture out of the air and materials. This phase can take anywhere from 24 to 72 hours, depending on the extent of the saturation. Proper drying is essential for preventing mold growth and ensuring the drywall is ready for repair.
Step 3: Damaged Drywall Removal and Disposal
If your drywall is heavily saturated, stained, or compromised, it needs to be removed. We carefully cut out the damaged sections, ensuring we remove all affected material. We then properly dispose of the wet materials, preventing any further spread of moisture or potential contaminants. This step helps ensure you have a solid foundation for repairs.
Step 4: Mold Prevention and Air Quality Treatment
As part of our drying process, we often apply antimicrobial treatments to the affected areas to inhibit mold and mildew growth. We also focus on ventilating the space to improve air quality. This proactive measure is vital for the health of your home and family, creating a safer, cleaner environment.
Step 5: Drywall Repair and Finishing
After the area is completely dry and treated, we’ll hang new drywall, tape, mud, and sand it to match your existing ceiling texture. Our goal is to make the repair virtually invisible. This final step brings your ceiling back to its original condition, often taking 1-3 days depending on the size of the repair and drying time between coats of mud. We aim for a flawless, seamless finish.
Don’t let a leaky ceiling ruin your home’s appearance or integrity. Reach out to us today for a swift, professional assessment and let’s get your ceiling back in perfect shape.

Warning Signs You Need Ceiling Drywall Water Damage Restoration
Catching water damage early is your best defense against costly repairs and potential health hazards like mold. Your ceiling might be trying to tell you something’s wrong, even before you see a big stain. Recognizing these subtle signs can save you a lot of trouble down the line. We’ve seen it all around here, and a little vigilance can go a long way in protecting your property.
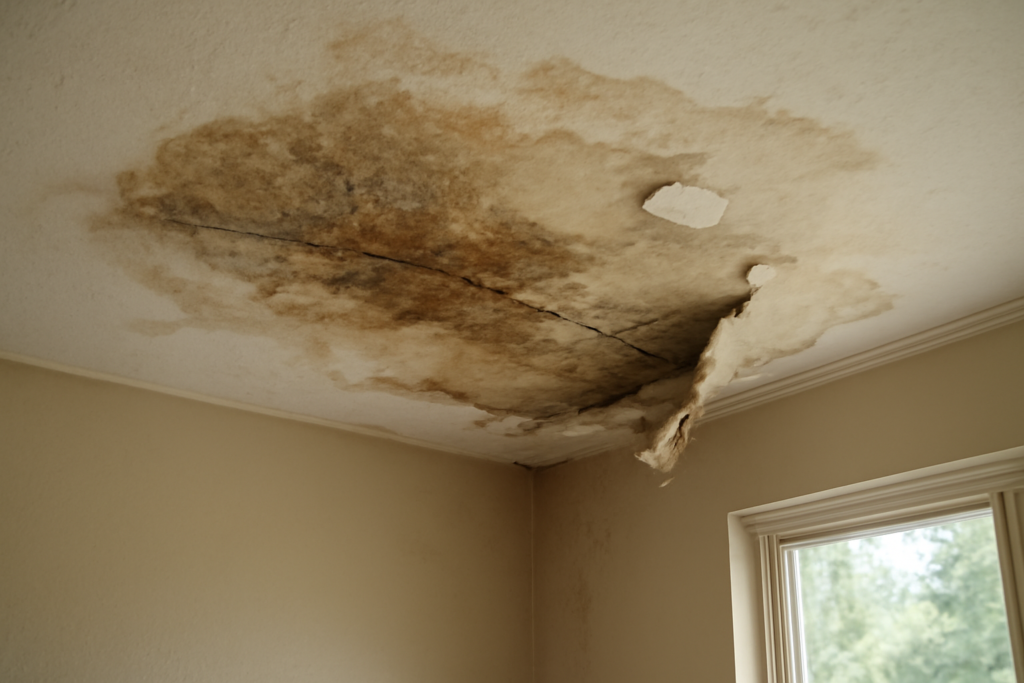
Discolored Spots or Stains
Yellow or brown stains on your ceiling are a clear indicator of water intrusion. Even small spots mean water has been present, potentially weakening the drywall over time. Don’t ignore these early warning stains.
Sagging or Bulging Drywall
If you notice your ceiling starting to droop or bulge in a particular area, it means the drywall is saturated and its structural integrity is compromised. This is a serious sign that requires immediate professional attention.
Peeling Paint or Wallpaper
Water can cause paint to blister and peel away from the drywall surface, and it can cause wallpaper adhesive to fail, leading to lifting or bubbling. This is a visual cue that moisture is present, so check for deteriorating finishes.
Musty Odors That Won’t Go Away
A persistent damp, musty smell, especially in a specific room or near a particular ceiling area, often signals hidden moisture and potential mold growth. Addressing these unpleasant, tell-tale odors is crucial for your home’s health.
Water Droplets or Puddles
While obvious, even small drips or visible puddles are a direct sign of an active leak that needs immediate intervention. Don’t delay in dealing with visible water presence.
Mold or Mildew Growth
Any visible signs of mold or mildew, often appearing as black, green, or white fuzzy patches, mean there’s been standing moisture for a while and it’s time for professional remediation. This indicates a significant moisture problem.
Ceiling Drywall Water Damage Restoration vs. DIY: When To Call a Professional
| Situation | DIY? | Call a Pro? | Why |
|---|---|---|---|
| Tiny, fresh water spot on a smooth ceiling, no visible damage. | Yes | No | You might be able to gently blot and dry it, then touch up paint. |
| Yellowish or brownish stain appearing on the ceiling. | No | Yes | Stains indicate water has soaked in and could be weakening the drywall. |
| Ceiling drywall is visibly sagging or bulging. | Absolutely Not | Yes | This is a structural risk; the drywall could collapse, causing injury and more damage. |
| Small, localized area of peeling paint near a light fixture. | Maybe | Yes | It’s worth checking for a minor condensation issue, but a pro can confirm and repair. |
| Musty odor emanating from a specific ceiling area. | No | Yes | Hidden moisture and potential mold growth require specialized detection and treatment. |
| Water actively dripping from the ceiling. | Absolutely Not | Yes | This is an emergency situation requiring immediate water extraction and damage assessment. |
For anything beyond a minor, fresh water spot, calling a professional is almost always the wisest choice for ceiling drywall water damage. Our team has the specialized equipment and expertise to handle the drying, mold prevention, and structural repairs that DIY methods can’t address effectively. It’s about ensuring the job is done right the first time, preventing future problems and protecting your investment.
Ceiling Drywall Water Damage Restoration Cost In Country Club, FL
The cost for ceiling drywall water damage restoration in Country Club, FL can vary quite a bit. Factors like the size of the affected area, the extent of the water saturation, the complexity of accessing the damage (like in a high-ceiling room or attic), and whether mold has started to grow all play a role. These price ranges are estimates for typical scenarios.
| Service Aspect | Typical Price Range | What Affects Cost |
|---|---|---|
| Water Damage Assessment & Inspection | $200 – $600 | Complexity of attic access, need for thermal imaging. |
| Water Extraction & Drying (per room) | $500 – $2,000 | Size of affected area, duration of drying needed, amount of equipment required. |
| Drywall Removal & Disposal (per sheet) | $75 – $150 | Ease of access, amount of material to remove. |
| Mold Remediation (if necessary) | $750 – $3,000+ | Severity of mold growth, size of contaminated area, containment protocols. |
| Drywall Repair & Finishing (per sq ft) | $3 – $7 | Ceiling height, texture matching, number of coats of mud needed. |
| Priming & Painting (per room) | $300 – $800 | Ceiling height, total square footage, number of coats, primer type. |
Remember, these are just estimates. The most accurate pricing will come after our team performs an on-site assessment of your specific situation. We offer free estimates, so you’ll know exactly what to expect before we begin any work.
Service Areas Near Country Club, FL
Aventura, Bal Harbour, Bay Harbor Islands, Biscayne Park, Broward County, Coconut Creek, Cooper City, Coral Gables, Doral, Fort Lauderdale, Hallandale Beach, Hialeah, Hollywood, Indian Creek, Ives Estates, Key Biscayne, Lake Forest, Lauderdale Lakes, Lauderhill, Lighthouse Point, Margate, Miami, Miami Beach, Miami Gardens, Miami Lakes, Miami Shores, Miami Springs, Miramar, North Bay Village, North Miami, North Miami Beach, Oakland Park, Opa-locka, Parkland, Pembroke Pines, Plantation, Pompano Beach, Sunny Isles Beach, Surfside, Tamarac, Weston, Wilton Manors.
Common Questions About Ceiling Drywall Water Damage Restoration
What’s the first thing I should do if I see water damage on my ceiling?
The very first thing you should do is try to identify and stop the source of the leak if it’s safe to do so, like turning off a specific faucet if you suspect a plumbing issue. If you can’t find the source or it involves your roof, place buckets to catch dripping water and then call us immediately. Prompt action is crucial for minimizing further damage and ensuring a successful restoration.
How long does it typically take to repair ceiling drywall water damage?
The timeline can vary significantly. The drying process alone can take anywhere from 24 to 72 hours. After that, repairs, texturing, and painting can add another 1-3 days. We work as efficiently as possible to get your ceiling restored, but it’s important to allow adequate time for thorough drying and proper repairs.
Will water damage to my ceiling cause mold?
Yes, it absolutely can. Drywall and the insulation above it are porous materials that hold moisture, creating the perfect environment for mold and mildew to grow within 24-48 hours if not properly dried. That’s why our process includes aggressive drying and often antimicrobial treatments to prevent mold development.
How much does it cost to fix water-damaged drywall on a ceiling?
The cost depends heavily on the size of the damaged area, the extent of the saturation, and whether mold is present. Minor repairs might be a few hundred dollars, while extensive damage requiring significant drying and replacement could range from $1,000 to $3,000 or more. We provide detailed, transparent estimates after an on-site inspection to give you a clear cost.
Can I prevent water damage to my ceiling in Country Club, FL?
Regular maintenance is key. Keep your gutters clean and ensure they’re properly directing water away from your foundation. Inspect your roof for any signs of wear or damage periodically. If you have plumbing or HVAC units in your attic, check them for leaks or condensation. These preventative steps can significantly reduce the risk of future ceiling water issues.
Check Our Other Relevant Services

Christopher Cannon: Damage Restoration Expert
Christopher Cannon is a licensed restoration specialist with more than 20 years of dedicated experience in property mitigation and disaster recovery. Known for his technical precision and authoritative industry knowledge, Christopher has spent two decades helping property owners navigate the aftermath of unforeseen damage.
𝗖𝗲𝗿𝘁𝗶𝗳𝗶𝗰𝗮𝘁𝗶𝗼𝗻𝘀: Christopher maintains a robust portfolio of IICRC certifications, including Water Damage Restoration (WRT), Mold Remediation, Applied Structural Drying (ASD), Odor Control, and Fire and Smoke Restoration. These credentials reflect his commitment to the highest safety and restoration standards.
𝗕𝗲𝘀𝘁 𝗣𝗮𝗿𝘁 𝗼𝗳 𝘁𝗵𝗲 𝗝𝗼𝗯: He finds the greatest satisfaction in being the “calm during the storm,” helping families feel secure as they watch their property return to a safe, healthy state.
𝗙𝗮𝘃𝗼𝗿𝗶𝘁𝗲 𝗣𝗮𝘀𝘁𝗶𝗺𝗲: An avid outdoorsman, Christopher enjoys mountain biking and spending quality time with his family.